Wild Bill
Member
Built some sides for the bed this past week.
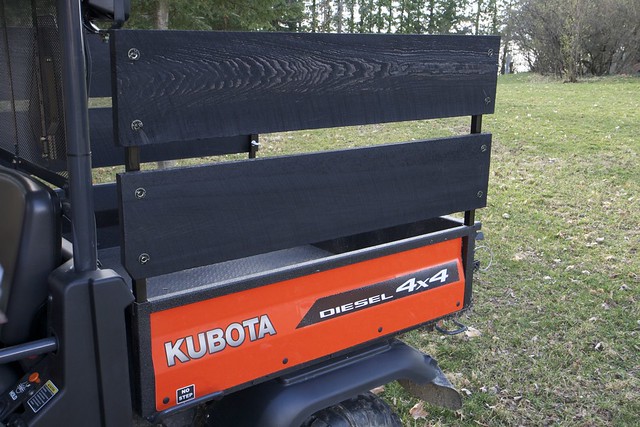
I used four 36" long 1" square tube sections for the poles. They slip right in the existing pockets. I cut four 50" long rough 1x10's for the sides. Those 4 boards then soaked up an entire quart of Minwax ebony stain. 3/8" bolts and eye bolts were inserted from the inside. T-nuts were were used to secure the bolts from the outside. The remainder of the bolts were cut off flush.
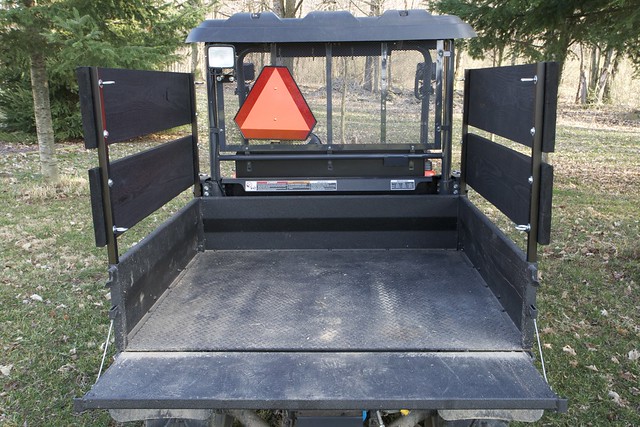
Here you can see there were eight 3/8" eye bolts aded for addition hold downs. I had to move the rear facing light inboard from the roll cage for clearance.
I used four 36" long 1" square tube sections for the poles. They slip right in the existing pockets. I cut four 50" long rough 1x10's for the sides. Those 4 boards then soaked up an entire quart of Minwax ebony stain. 3/8" bolts and eye bolts were inserted from the inside. T-nuts were were used to secure the bolts from the outside. The remainder of the bolts were cut off flush.
Here you can see there were eight 3/8" eye bolts aded for addition hold downs. I had to move the rear facing light inboard from the roll cage for clearance.
")