Stick stopper install

menchhofer

New member
Okay...received stick stoppers from Peanut today and just wondered how to install them. I realize the smaller piece replaces the plastic one, but where/how does the other part fit? Just thought I would ask before I got dirty. thanks
 
Searched for install pics and found some but cannot find where to put the two triangle pieces for lack of a better description. Picture attached.
 

Attachments

  • 100_1286.jpg
    100_1286.jpg
    76.7 KB · Views: 186
menchhofer. the triangle is placed on the top side of the a-arm opening. The largest piece then is bolted to the triangle piece through the opening on the A-arm resulting in the A-arm being sandwitched between the triangle and the large piece of the stick stopper. Bolting this together will ultimately eliminate the original A-arm opening.

I have some pretty good instructions from Peanut sent as a PM. If I still have those instructions, I send them to you. Peanut can certainly describe the assembly the best.
 
Menchhofer, below is the instruction Peanut provided to me that worked great. I hope this helps.

Pepr

the big main piece goes up from the botton and that little trianlge piece bolts them together from the top. you then take the bent piece and bolt it to the front with the slanted part facing the tire the little triangle piece is just there to hod them in place . it should have two 3/8th bolts that bolt through both top and bottom pieces.throw away your old bolts that hold the original plastic stick guards in place and use the longer ones i sent you.i switched over to all stainless steel so there won't be any bolts rusting away.if you have any problems please let me know i want you to be satisfieds with them anything short of that is a failure on my part so please ask me anything you want.i wish i had an rtv so that way i could take pics of the install .
__________________
certified pipe welder and certified 6gr fluxcore/stick firstclass pipe and ship fitter . and first class welder.
 
Hi Menchhofer. I bought a set of Peanuts' stickstoppers for my XT in the early Fall. I think Peanut said he was changing the design somewhat because of the opening size difference in the A arm's year models since mine was diffferent. So I'm not sure of what dimensions you have. Anyway, the opening I am speaking of is in the A arm by the ball joint. The holes in the bottom plate (with the sides) are sandwiched on the A arm by adding the triangular piece to the top side. Then the holes in those 2 pieces are lined up and bolted on, making sure that the holes in the side are also in alignment for the curved pieces to be added. On the wavy curved piece, I put the sloped side toward the tire so it alows the tire to turn as it should without interference. On my 2011, I did not use the sandwich pieces because I need the A arm opening for cleaning out manure I drive through every day. I just bolted on the wavy pieces in place of the plastic ones. I don't need the rear protection yet given by the "sandwich" This is my account of how they go but I could be wrong. Good Luck and others will chime in if I'm not correct. Good Luck! bordercollie
 
yes the big main piece goes up uder the a-arm then you put the small triangle piece on top and bolt it in with the 5/16 bolt you can then use the new longer screws to bolt the front curved face plate to the front. i have to get down and draw a diagram of them that way it will be easier to install. i leave a bit of weld on them that way they don't completly touch the a-arm and drill a few holes in them so water can flush out any mud that might get stuck in there also the holes should alow air to dry up any moisture that gets in between the a-arm and the plate. you can just install the front face plate and leave the other two pieces off but if you run where there are stumps or rocks i would recomend installing the whole thing that way if you come down hard on a stump or rock the stickstopper plate will take the hit and not the a-arm. if you have any problems just pm me and i'll talk you through it but it's a pretty simple install. the slanted side of the curved plate goes towards the tires.

yes i did change the design and went from 6 bolts down to one bolt in the center to hole them together that way they will fit any year model the problem me and bordercollie ran into was the newer models had a smaller opening and it covered the bolt holes on the two plates thats why i went with just one stainless steel bolt in the middle . i did switch to all stainless steel bolts but i had a time trying to find some more metric bolts for the front so i went with regular steel in the front this time .i'm trying to find a box of them that way i can have plenty on hand when needed. i would recomend the if you can swap the two front bolts out with stainless if you can find them they are 6mmx1.00 pitch x1 1/4 long or when i get some more i can send you some just let me know.
 
Wow, those stick stoppers are a lot different and more robust then your first set (that's sitting on my RTV). Mine are just a flat piece of steel that goes over the front a-arm.
 
yea they have evoled alot sinse the first ones i done. i keep changing them as time goes on because someone will sugest this or that and i make the improvements due to what they say .so in other words ya'll ask and ya'll recieve.
 
Thanks everyone. All the previous install pics only showed the front curved piece and I did not fully understand where the other parts went. Thanks pepr for the added explanation along with peanut and everyone else. I now think I can handle it.
 
Menchofer: installation of the stick stoppers will go a lot faster and easier if you jack up your RTV and remove one of the front wheels ... do the stick stoppers on that side, replace the wheel, then repeat on the other side. Voice of experience here ....
 
I don't know how many hrs are on your machine,but when the wheels are off is a good time to change out the oil in the knuckle cases if it s time anyway. bordercollie
 
Hopefully as part of the "evolution" he does not throw the metric bolts in with the 1/4-20 bolts in the same bag.:whistling::hammer:
Old eyes have a hard time laying on your back and wondering why the dang nuts wont start!:beatdeadhorse5::yankchain:
 
lmao yea i still put the metric ones in because the stock ones just ain't long enough. plus the standard 1/4 nut should slide right over the 6mm bolt. i changed the bolts around after bordercollie informed me they changes the a=arms on the 2011 models so now the set only has 6 bolts all together two 5/16 bolts to go in the center one on each a-arm and the two metric bolts that go in the front to replace the stock ones.
 
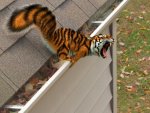
We have still have the first set of RTV Stick Stopper Boot Savers that Peanut ever made. They are still as strong as the day I installed them.

Save us a many of $$$$$$$$$$$ and a many of headaches !!!!
 

Attachments

  • Louisiana Cat Squirrel.jpg
    Louisiana Cat Squirrel.jpg
    83 KB · Views: 107
yea if it wasn't for you asking me if i could make a better stronger set than the one you bought i would have never made anything for the rtv. twoguns bought a set off the internet and wasn't pleased at all with what he recieved so he called me one night and asked if i could make him a set so he shipped the ones he bought to me and i went from there .we kept sending measurements back and forth until we ended up with what we have today. the first plates was striaght with no curve to them but twoguns went to his buddy who has a machine shop and had him bend some curves in it then he sent me a pattern of the curve.i went to the dump and found some old trampolene springs and bought a 12 ton hydraulic jack and made me a press to bend the plates i'm still useing that same press today never went out and bought a press to replace it. i can duplicate any part you need made if you send the broken one to me so far i have shipped stickstoppers as for as novascotia. and the great yukon. not sure how many years ago we started this maybe 4 or 5 years ago i think.

i done a few bumpers for 4 wheelers around here i had one guy drop off his honda it was brand new with only 3 hours on it. done a few rops for some razors too.copied the plastic fenders off my old hpx and made some aluminum ones . it's a fun hobby and it's nice to see your stuff on the internet too.the best part is i'm just glad to be of help...
 
Top