Cheap Light Mounts

bordercollie

Gold Site Supporter
GOLD Patron
I am slowly getting around to putting lights on the '11 900. I am starting to need them more due to the time change so this is what I did. First, I went to wallyworld and bought a pair of truck flood lights for about $23.. I didn't have any mounting brackets though because the lights were made for mounting to a bumper and not a roll bar..
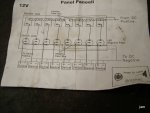
I decided to use a 2" muffler clamp -cost $1.65 per side-to mount them to my roll bar using a piece of angle iron. I cut 2 pieces of angle iron and drilled it out to fit the clamp and the bolt from the light .Then I put a piece of rubber between the roll bar and angle iron. This helps hold the lights snug. The set of lights came with a switch but I am working on a console to run several things off of.
Back when I had the '05,I never liked the way the oem lights had the little slide switch on the backside of the lights and so I hooked those up to a led switch mounted panel on the roll bar and turned them on with that. I am planning the same method for these and the rear work light. bordercollie
 

Attachments

  • DSCF3970.JPG
    DSCF3970.JPG
    32.4 KB · Views: 335
  • DSCF3968.JPG
    DSCF3968.JPG
    27 KB · Views: 335
Bordercollie, looks like some more innovation from you as expected. Keep us informed how this woeks out. I will likely follow suit with mine in the very near future, fortunately,I will not need extra lights until March which is when my calving season begins. Great Job as always!
 
It's a work in progress. I used the bedliner spray on the brackets and am keeping my eyes open for a better piece of rubber backing. All said and done the pair of 50 w lights and clamps with homemade brackets were about $30 including tax. Thank you both for the kind words. bordercollie
 
Good job Bud............For rubber mounting on LOTS of stuff, I use some left over horse stall mat that I used on the bed.........I cut it with the band saw or have even used the table saw for large chunks...........

I made a panel with 4 power supply switches and a cigarette lighter that attaches to the roll bar that you refer to........These are on individual circuits in a seperate fuse panel/box mounted on the firewall next to the factory power/fuse panel.........One circuit to the back for fertilizer/sprayer, another to rear pointing light mounted on the back top corner of the cab, one for the front pointing lights mounted on the roof roll bar mounts, and a spare. All are lit/led's............Makes it really handy to just reach overhead when spraying without even looking for a switch................

Anyway.......PROUD for YOU.........God bless.......Dennis
 
That sounds real nice D&D. Yes it is really handy to use the rocker switches mounted on the roll bar. I only had 4 of them on my old machine. I had ordered different colored ,lighted ones for it so I would remember to cut them off when I parked. Now, the new ones are still lighted and also have built in circuit breakers but will need to be labeled because they are all the same color. I am using the quick disconnect plugs since I change equipment often.
I sure wouldn't mind having a Go lite but I am wanting to get a new electric smoker before long( must have a set and forget electric , I have a log burner) and am saving for that and the house work at my Mama's. I will never be through with that. bordercollie
 
Excellent posts ... as always ... Border Collie. Many thanks. I intend to install work lights atop my 900. I have a set of PIAA back-up lights I originally intended to install on my truck, but they'll give me better service on the 900.

I would appreciate it greatly if you could provide some fairly detailed info and pix regarding how you power your lights, including where and how you rig switches. I'm a total novice with things electrical and need all the help I can get.

Best wishes for Thanksgiving.
 
that would good info, where do you guys pull your power from to run everything? i used the wire with blue tape under the hood from my lights but can i run everything else from there? i spliced my power all the time wire from my radio to the blue wire on the key switch. i want to wire more lights but i want power only with the key.
 
Thank ya'll for the kind words but I am an amateur when it comes to electricity.Maybe Dennis and others will chime in with more info . I just went to amazon and did a search for .. Seasense switch panel .. There are several to choose from depending on where you mount it. The 8 gang one I got has re settable circuit breakers on each switch and each switch is rated at different amps- some a disappointing low . It is also supposedly waterproof or so it said. I will try to take a few pictures of mine's back tomorrow since I still have it mounted temporarily. I like it because you can run your fused hot wire to it's common "power" bar and it will put power to the all switches because it has this bar in common from each end, . Then you use a connector on the individual switch's additional prong to run hot to the item . The switches use a common grounding bar already built into the switches much like the hot's bar. This saves a lot of messy wires. As I run the hot wire( I put in an" in line fuse " in just before the battery ) to the battery connection, I also run the ground and have a pig tail from it at the needed locations for each item. I used the plastic corrugated split type wire covering for a clean look as I routed the wiring and used cable ties to hold it on.
I have seen the plugs with blue tape in various places on the kubota, The wiring is small on some of them that I noticed so I would'nt run a lot on just one of them. but there are several in different locations for the kubota options like the front and rear work lights ,turn signals speedometer coming from the transmission etc. bordercollie
 
Just providing the Seasense switch panel info is a good start for me, BC. Many thanks for that. I have a better idea of how this all fits together and I will begin planning how I want to make up a switch and where I want to mount it. This is great info.
 
Thanks Heatwave. Here are a few pictures of the switch I got.. I just used the quick disconnects and took it down so I could get a picture of the back and how it is set up.The orange switch glows when flipped into the on position, the oval in the center is for the id stickers, circuit breaker at the bottom.The red wires shown come already attached as pictured, you just hot that bar with the + on it and it will carry the power to each switch. It has 2 + bars , most likely for having 2 different wires to prevent an overload -I think. I did use different colored hot wires on the individual + prongs you see at the top of the switches so I could keep track of them easier as I routed the wires to where I wanted the individual power. I flipped the panel upside down so the grounded bar could be seen easier. It it soldered already to the switches so you jut need to ground the - bar(s) and from that, wire the ground to the individual items, I pigtailed and grounded the items from that one - wire. I have the original wiring diagram that came with the switch but have a "disc error on that picture so I will try posting that later. This is how I did it but then ........ bordercollie
 

Attachments

  • DSCF3982.JPG
    DSCF3982.JPG
    43.8 KB · Views: 255
  • DSCF3984.JPG
    DSCF3984.JPG
    50.5 KB · Views: 254
Wiring diagram

Here it is. Need to mention again that I added an" in line fuse" to the hot wire just before the battery- to protect it from any shorts or overloads. I never run a lot of switches at the same time. bordercollie
 

Attachments

  • DSCF3986-1.JPG
    DSCF3986-1.JPG
    37.8 KB · Views: 251
thats a good heads up on the panel it looks like a nice setup. pretty low profile too seems like it would mount just about anyplace really easy.
 
If you want to run several items using "key on" only power you should consider using a relay to get a nice heavy gauge wire direct to the battery and use the key on power source to activate the relay. That will prevent you from having a heavy draw on the factory light gauge wiring.:tiphat:
 
If memory serves me right back when I installed the oem worklights on my '05 model, The set came with a relay that just plugged into this blue taped plug in the electric access box and mounted in the designated place next to the others. The other end of the wiring for this also has blue tape on it and is ready for those lights to just plug into- I really meant to check this wiring before I sold the '05 but I forgot. Dog gone it.Maybe someone can check this that has the oems installed and see where it is. This would make the lights be key only - if I remember right. I can also just trace it out if needed with a trick or 2 my Dad taught me long ago. :) bordercollie
 

Attachments

  • DSCF3993.JPG
    DSCF3993.JPG
    49.3 KB · Views: 234
One last question, and I'll leave you alone: where did you mount your switchpanel?

I sent an email to the vendor asking for a price on the 8-switch panel, same as yours. I am going to press ahead with this project.

Now ... if only I can find a reliable engine-temp gauge ....
 
Heatwave, It is never a bother to answer a friend's question. I ordered my panel from Amazon and paid around $50. http://www.amazon.com/s/ref=nb_sb_n...field-keywords=seasense+8+gang+switch&x=0&y=0 They say waterproof about it but I have my doubts because it isn't rubberized in any manner. The mounting is still a work in progress. As of now, I have it secured between the plastic roof and the front roll bar using a couple of cable ties at the screw holes and one on the side on the other roll bar. I have the back protected to avoid it shorting out should it get shoved over hard or something. My plan is to build a " top console" with a cutout for the switch panel and maybe a small place for my safety glasses and binoculars to go- If I get creative maybe even my radio.....I'm thinking 2 small narrow pieces of angle iron mounted across the span cradling a thin plywood base, painted black and attached to the roll bars with muffler clamps. This would be mounted toward the front taking as little space as possible in order to avoid head hitting. This is another panel I liked: [ame]http://www.amazon.com/Seasense-Switch-Panel-Breaker-Rubber/dp/B004XADTGK/ref=sr_1_fkmr1_1?ie=UTF8&qid=1322443221&sr=8-1-fkmr1[/ame] There are several panels I like a lot but they were out of my price range at one of the boat sites.
.We will about be through calving in a week and will have lighter work for about 2 weeks before things get hectic again. I want to be through with mounting it permanently by then if you want to wait and see. bordercollie
 
I want very much "to wait and see." Thank you, again, for all your patient and informative assistance. I am definitely going to school on you. Right now, I'm thinking of installing a switch panel ... same as yours ... for (i) master on/off for the winch, (ii) front worklight, (iii) rear worklight, (iv) cab light, (v) speed brake drogue parachute, (vi) missiles pre-arm warm-up, (vii) missiles arm and shoot, and (viii) master on/off for M134G Minigun. Switches and installations for items (v) through (viii) are still in the planning stages.
 
I used something like bordercollie had listed on the second one.
 

Attachments

  • Overhead Panel Console One.jpg
    Overhead Panel Console One.jpg
    79.9 KB · Views: 209
Top